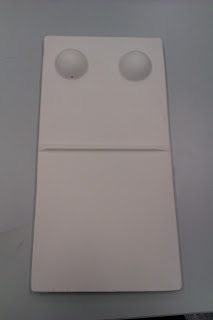
Since deciding not to continue with my glass experiments, I have now established that I want to create a mould in order to create my braille dominoes. This will be achieved by creating a former which will then be placed into the vacuum former resulting in the creation of a plastic mould which will then be filled with plaster.
As I have already stated, I aim
to create a former which I will then place in the vacuum former which works by
placing the former in the machine and lowering until the sheet of plastic on
top has been heated enough for it to mould to the shape of the former. When
this is achieved, the vacuum is then switched on and a mould is then left over
within the plastic sheet which plaster can then be poured into.
As I want to use the vacuum
former, a specific size can only be achieved, therefore the final piece will be
a smaller scale version of what the piece could look like if the resources were
available to me in a gallery setting. With this in mind, the measurements are:
Length
– 46cm Width – 26cm Depth – 2.5cm
This then means that these are the measurements of the
piece of wood which fits easily into the former and also leaves 1 inch gap all
the way round.
To start with I found a
spare piece of wood in the workroom and cut it to size using the bandsaw. I
then got another strip of wood of the right width to use as the domino divider
and again, cut to size and stuck on using the glue gun. I then began to stencil
on to the piece of wood to establish where the braille dots would go, as well
as estimate the ideal size of the braille dots to fit in with the size of the
overall domino. Eight sections were stencilled on as explained previously to
decipher where the braille dots would go as there are no more than 5 braille
dots used in any letter in order to spell conform.
Success!!


No comments:
Post a Comment